The College uses Microsoft Teams to help you share and Collaborate with your colleagues. You may be a member of one or more Team, and each Team has a Files repository for you to store your teams files and folders.
Sometimes, you may need to share a folder or files with people outside of the MS Team. Below are some options for you to request files from people, or to use a shared folder within your Teams drive, and provide access to others.
The College no longer uses shared network folders for Staff to keep folders and files on. The Staff Shared network drive was often used by people to allow staff to share files with others, or to request files from other staff, but you needed to be at the College to use this, or use the Colleges remote desktop server if you were offsite.
Below are Cloud Storage options for you to request files from staff or to share files with others, without the restriction of you needing to be on site.
Below, there are instructions for you to either request files from staff, or to create a shared folder in your Microsoft Teams storage and allow other staff to access and edit that folder.
2. Create a shared folder in your Teams Drive
Request files from People using a 'File Request'
With a file request:
-
Anyone can send you a file - they don't need to have OneDrive.
-
All the files sent to you are saved in a single folder that you choose.
-
People who respond to your request can only upload files. They do not have view or edit access to your OneDrive.
Requesting files
Here's how to request files:
-
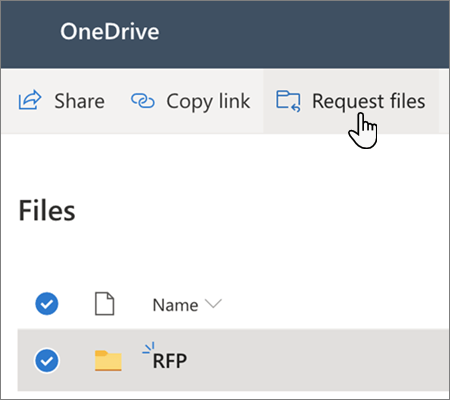
In your OneDrive online (go to onedrive.live.com), select the folder where you want the files to be uploaded, and then click Request files. You may want to create a new folder.
-
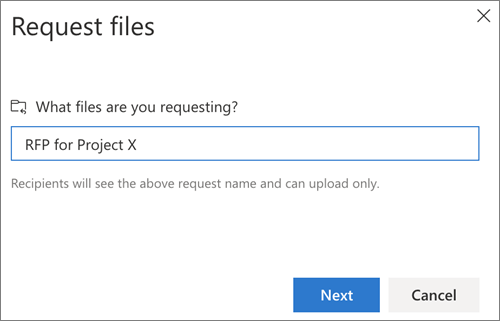
Under What files are you requesting, enter a descriptive name for the files you are requesting from others. (They'll see this description when they get the file request.)
-
Click Next.
-
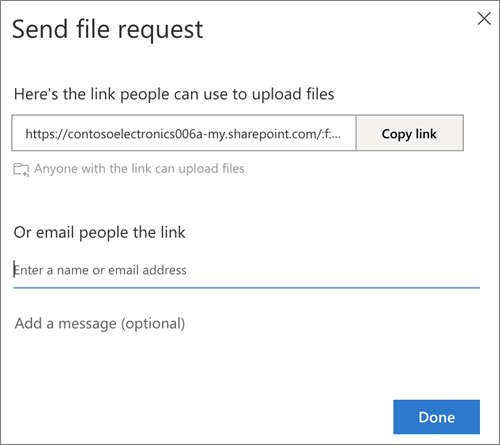
You can click Copy link to copy the request link and send it to anyone you would like to request files from, or you can enter the email address or addresses of the people you want to request files from. You can also type a message that will be included in the email that OneDrive sends to them.
-
Click Done.
You’ll receive a notification email whenever someone uploads files to your file request folder.
If you want to edit the descriptive name of the file request, select the folder and click Request files again, then change the name. The people you sent the request to will see the new name when they upload files.
Getting a file request
Anyone with the link will be able to upload files to the request. However, they aren't able to see or edit other contents in the folder or see who else is able to upload files.
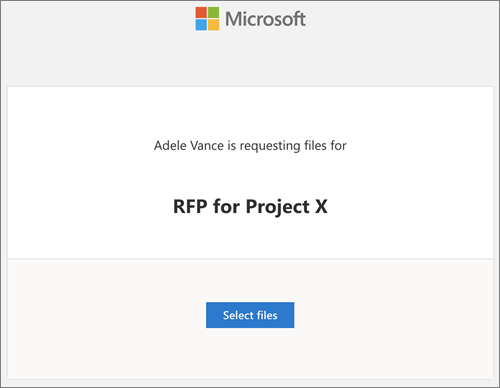
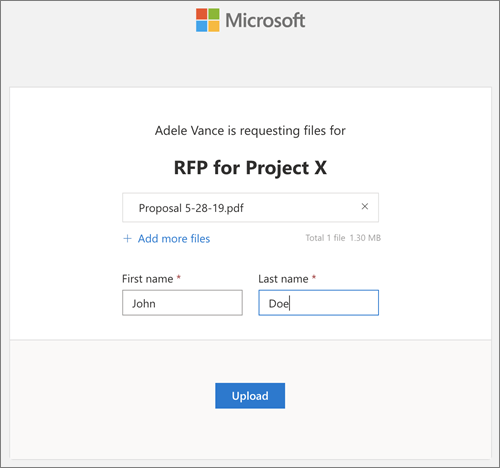
When recipients click the link, they'll see:
Notes:
-
If the recipient is not signed in, the recipient will be asked to add a first name and last name to help the requestor identify the different files uploaded. The provided first name and last name is not validated; it is purely for the requestor's convenience, and is not a guarantee of identity when the recipient is currently not signed in.
-
If the recipient is signed in and responds to the request, the identity is recorded as part of the upload.
-
Click Select files, browse to the appropriate folder, and select the file being requested. If you need to add additional files, click Add more files.
-
When you've selected all the requested files, click Upload.
-
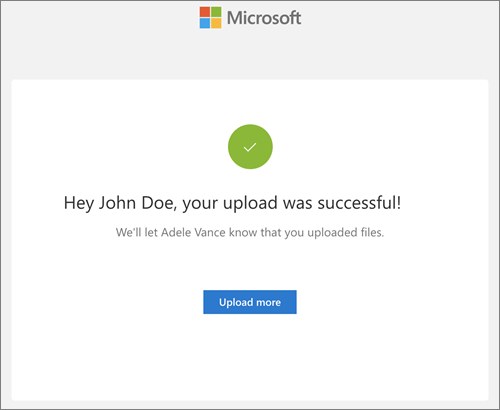
Recipients will get another notification once their files have been successfully uploaded.
Stop requesting files
You can stop requesting files by deleting the file request link once you are done receiving files from others. Once you’ve deleted the link, people with the link won’t be able to upload files to that folder anymore.
-
In OneDrive, select the file request folder.
-
Click the […] menu.
-
Click Manage Access.
-
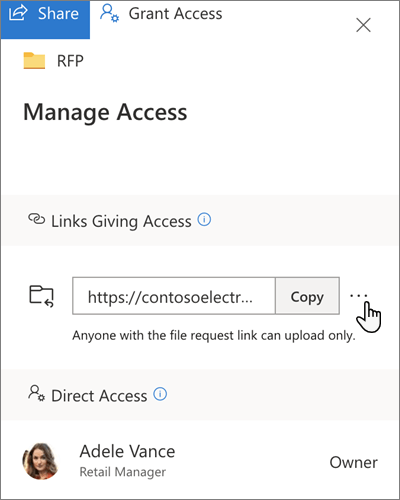
Click the […] menu beside the request link in the Links Giving Access section.
-
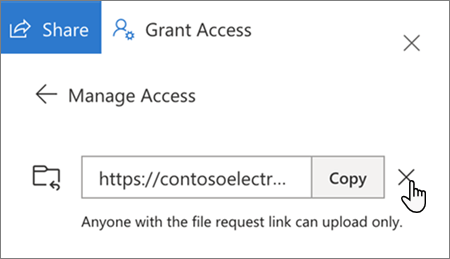
Click X next to the link.
-
Click Delete link.
The link deletion cannot be undone. If you need to start collecting files in this folder again, create a new file request on the folder and send your recipients a new link or email invitation.
Create a Shared Folder in a Teams Drive.
This option will allow you to create a shared folder in your existing Department Team Drive. For example if you have a department or faculty Team Drive, and you want to share a specific folder with people outside of your department, then you can share that folder with others at the College.
1. In teams, go to the Team where the folder is, or where you wish to create a new folder.
2. Go to Files -> Open in Sharepoint
3. If prompted, log into Sharepoint with your College credentials
4. You will see your Teams drive and folders. Find the folder, or create a new folder in the appropriate location. Click on the 3 dot menu next to the folder nam, and select 'Share'
5. The default settings will be displayed. Click where is tells you what the current setting is. This share setting below will allow anyone with the link to be able to access and edit the folder. You can get the link to the folder by clicking on the 'Copy Link' button at the bottom of the settings window. You can also send the link directly to specific people by typing their names into the name field and pressing send.
Send the link to people who you wish to have access to this folder by email, or via a Teams message. As long as they have the link, they will be able to access this folder.
You can perform the exact same process as above to share a specific file in Teams with others.
NOTE: anyone with the link to this specific folder will NOT give them access to other folders or files in the rest of your Team, just the one that they have the link for.
To Delete the Link and remove access to others
If you no longer wish for others to have access to the folder, you can simply remove the link, which will remove their access to the folder. They will be denied access if they try to access the link.
1. Click on the 3 dot menu next to the shared folder or file
2. Go to Manage Access
3. You will see the link under 'Links giving access'. Click on the 3 dot option button next to the link
4. You will have the options related to this link. Click on the X next to the link to delete it
You will be asked to confirm that you want to delete the link. Click Yes. This will NOT delete anything in the folder, it will just delete the link to the folder and other peoples access.

Comments
0 comments
Please sign in to leave a comment.